I recently got my manager’s approval to sit the Aruba Certified ClearPass Expert (ACCX) lab exam while attending the Aruba Atmosphere Conference in Sydney, Australia this year. While I am pretty confident with most things ClearPass, I have no idea what to expect come exam time (it’s an 8 hour practical lab) so I decided to emulate an entire enterprise environment in my home lab and blog the entire process. It’s perfect timing really as I’ve just built this site and needed some content to kick it off.
In this post I will show you how to deploy an Aruba ClearPass Virtual Machine (VM) in ESXi and get the server on to the network ready for you to start configuring Service Policies. Note that I used ClearPass version 6.7 in this guide so the steps may be different for previous or future versions.
- ClearPass Virtual Machine Requirements
- Image Verification
- ESXi Installation
- ClearPass Configuration Wizard
- License Activation
ClearPass Virtual Machine Requirements
The table below shows the minimum resources required to operate ClearPass version 6.7.
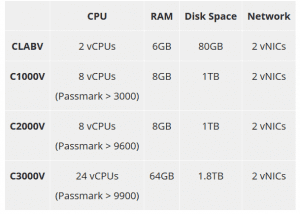
Image Verification
We then need to verify the advertised MD5 or SHA256 checksum and ensure it matches the computed checksum of the downloaded image. I use a Microsoft Windows tool called WinMD5.
Don’t skip this step! There is nothing worse than having to re-download an image because it got corrupted somewhere along the way.

ESXi Installation
I access my ESXi console natively using HTTPS in my lab (no vSphere client).
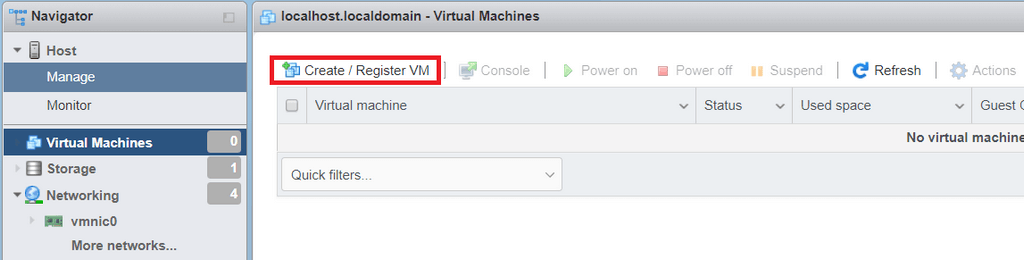
First we need to register the VM. Click Create / Register VM.
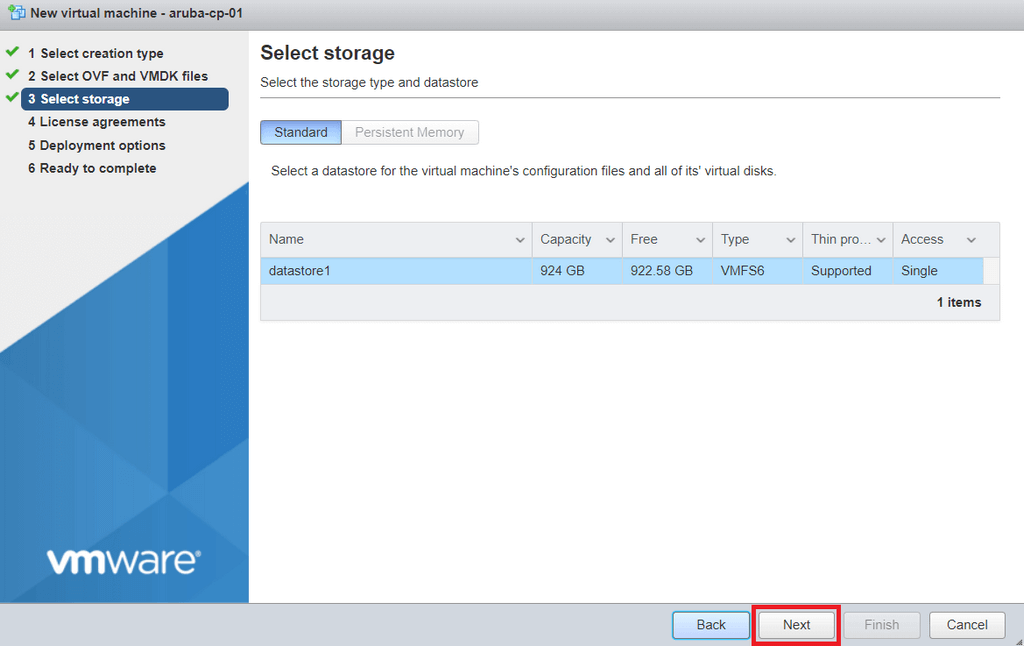
Select the storage where you want to install the VM and click Next.
Read and accept the License agreements. Select I agree and hit Next.

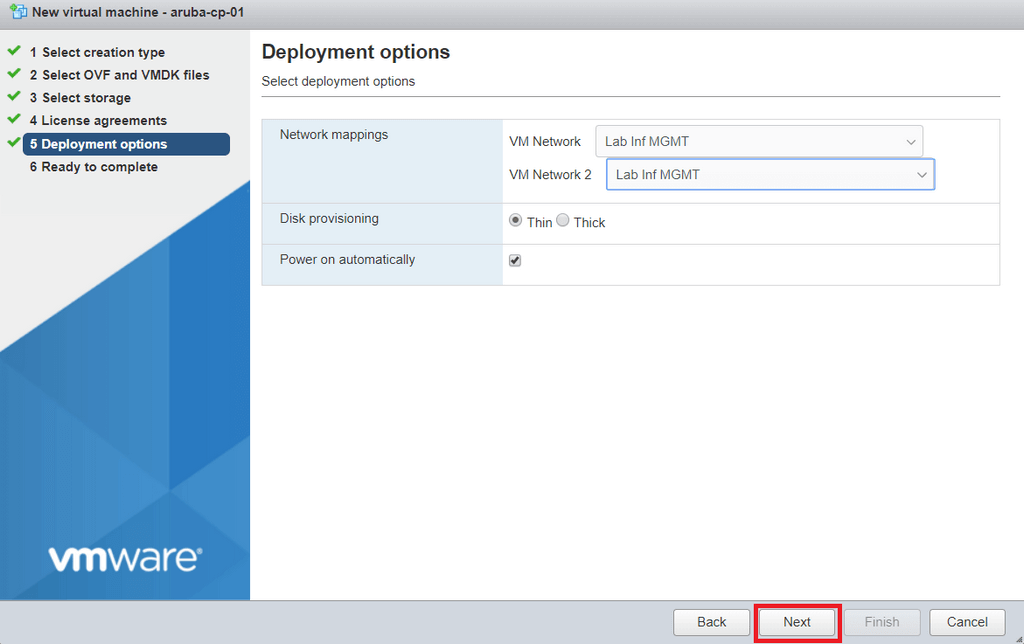
Assign the ClearPass Network Adaptors to the appropriate VM Networks. Each Network Adaptor has it’s own function:
- Network Adapter 1 = Management Port (Policy Manager & Guest Operator Access etc.)
- Network Adapter 2 = Data Port (RADIUS & TACACs data coming from NAS IPs etc)
Note that Network Adapter 2 does not have to be used, but it has to be assigned to a VM Network when provisioning the VM. The IP address can be left unassigned when configuring ClearPass during the configuration wizard. If ClearPass only has a single IP address assigned to the Management Port, the Management Port also ensures the role of the Data Port.
Also select your Disk provisioning and Power on requirements.
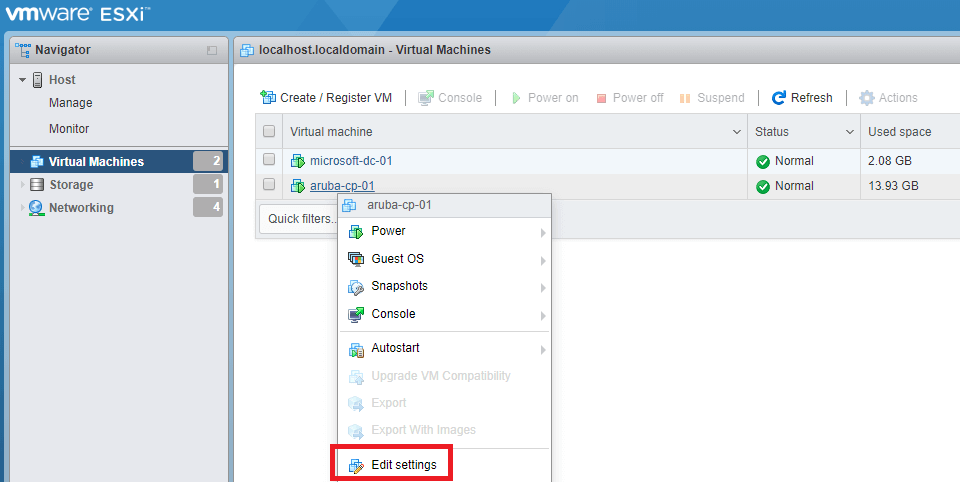
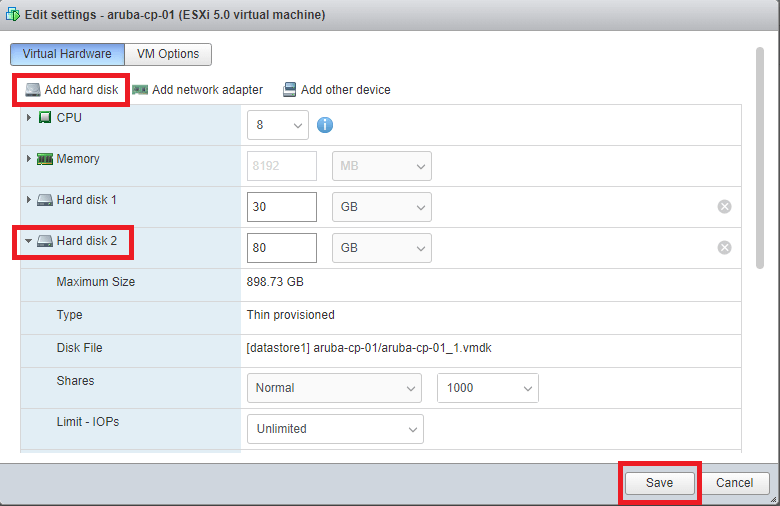
We need to add a second hard disk to the ClearPass VM. Right Click the VM and click Edit settings.
Click Add hard disk and enter the size required for the VM. I want to use the CLABV system so I require 80GB. You can also specify additional options by clicking the down arrow next to Hard disk 2. Click Save.
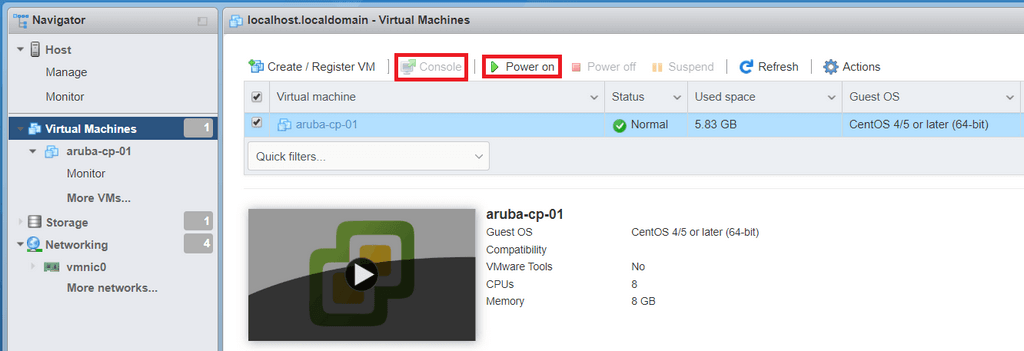
Select the VM, click Power on and click Console to establish a virtual console to the VM.
ClearPass Configuration Wizard
Select the Appliance type you require.

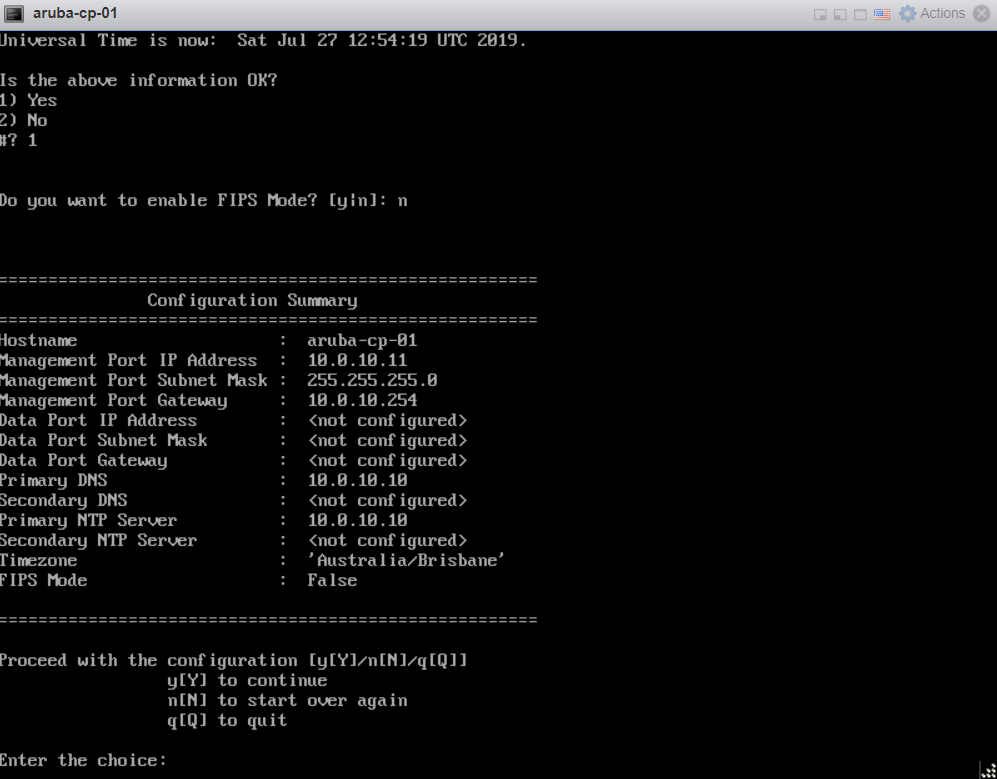
If your system configuration meets the minimum requirements, press y and hit Enter to proceed with the installation.
Answer the questions presented to you via the configuration wizard. Once complete you will be presented with a summary of the configuration. Review the configuration details listed in the summary and press y to continue if correct.
Login to ClearPass using the default credentials:
- username: admin
- password: eTIPS123

License Activation
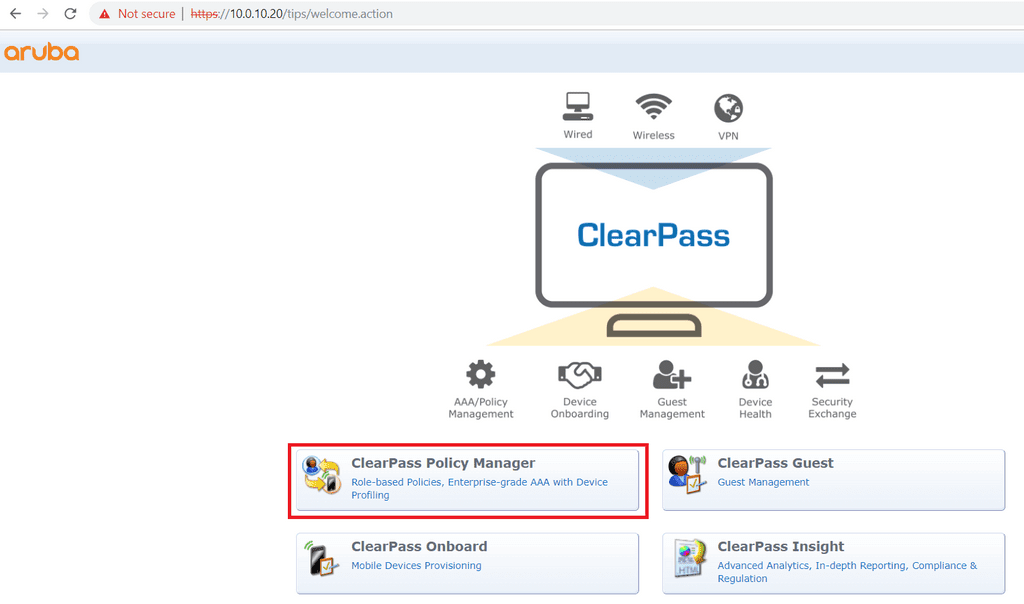
Login to the ClearPass web console by browsing to the IP Address you configured on the Management Port using your favourite browser and click on ClearPass Policy Manager.
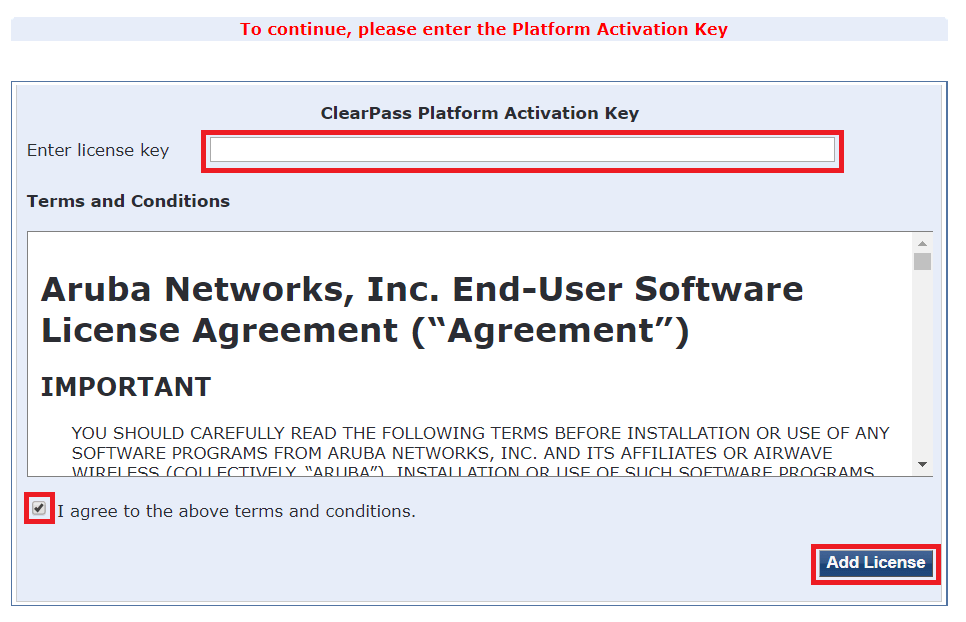
Enter the license key that you received from Aruba, agree to the terms and conditions and click Add License.
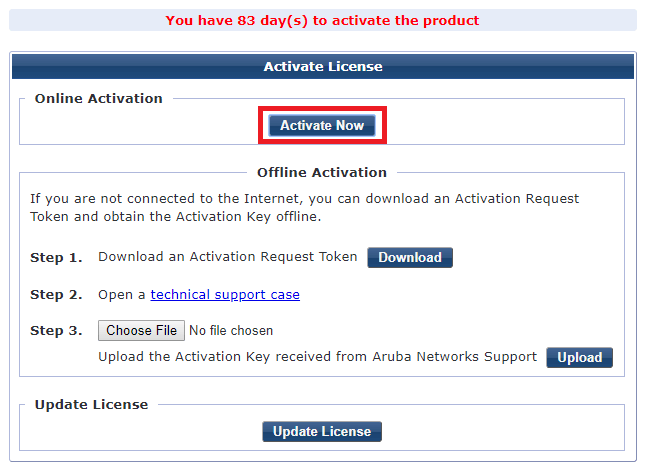
Click Activate Now to activate your license key.
As my ClearPass server has access to the Internet, I am using the online activation method.
If successful, you will receive a notification that activation was successful.
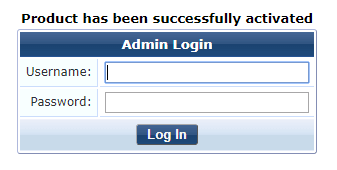
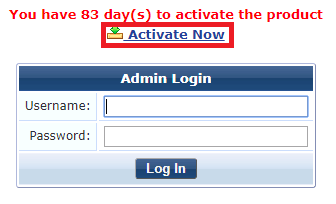
Login with the admin account using the password that you set previously in the configuration wizard. Congratulations, you have just provisioned an Aruba ClearPass 6.7 VM!
Good start Brett!
Nice article..Can you please share the clearpass VA ..Cant download it from the support portal
Hi Rob… Thanks for the kind words! If you are an Aruba customer you can request a trial from Aruba support or an Aruba partner. I suggest you reach out to them.