In this post I will show you how to authenticate Aruba ClearPass admins against Active Directory (AD) using the TACACs protocol. There are much easier ways to configure TACACS policies, i.e. we could copy the inbuilt services or use the service templates and wizards, but you wouldn’t learn anything!
- TACACS Workflow
- AD as an Authentication Source
- AD Users and Groups
- Admin Privilege Levels
- Enforcement Profiles
- Role Mapping Policy
- Enforcement Policy
- Service
- Verification Testing
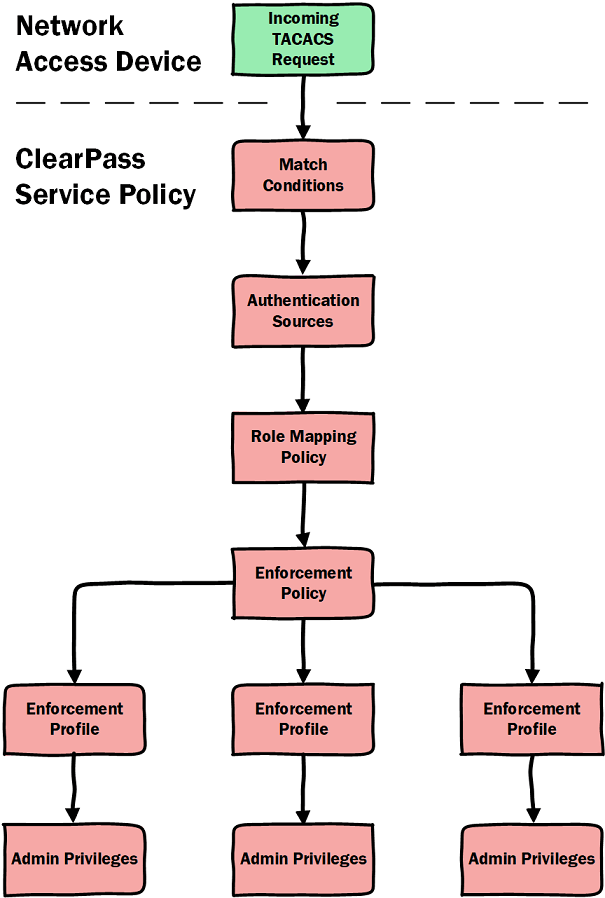
TACACS Workflow
The TACACs workflow for ClearPass can be a little confusing at first so I have created the image below in an attempt to simplify it for those just getting started. In this scenario just remember that the Network Access Device (NAD) is actually ClearPass itself.
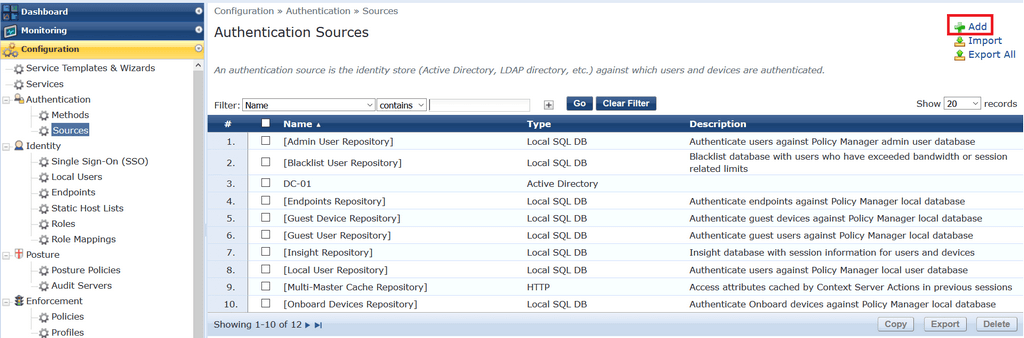
AD as an Authentication Source
To configure AD as an authentication source click Configuration > Authentication > Sources and click Add to create a new authentication source.
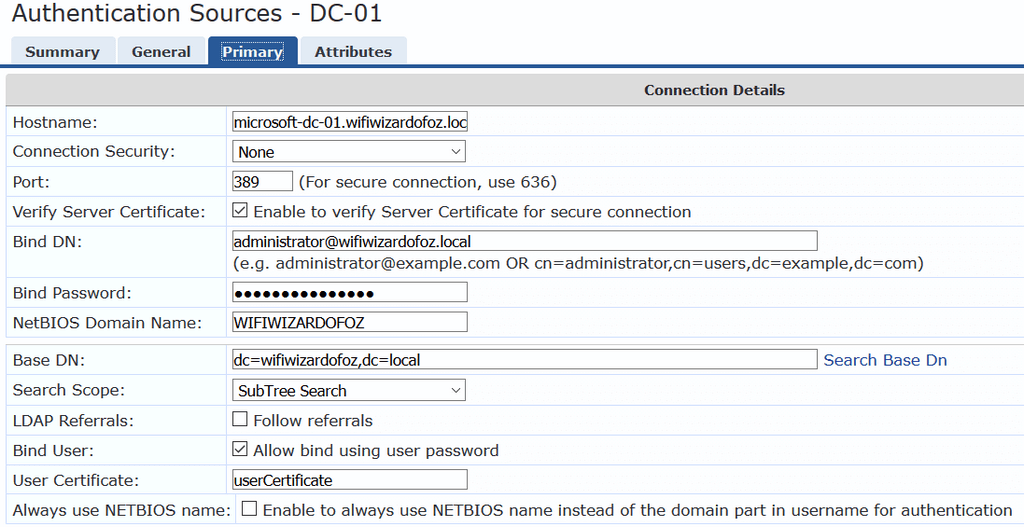
Fill out the the DC hostname, bind DN and password, base DN and any other settings you require and click Save.
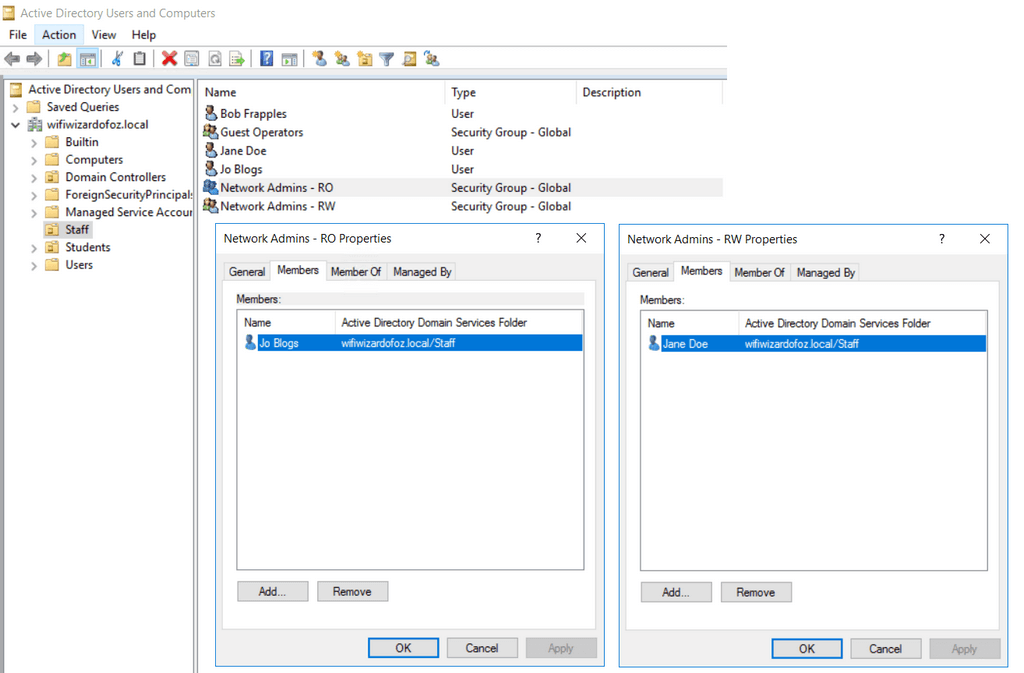
AD Users and Groups
ClearPass Policy Manager (CPPM) has five Admin privilege levels available for

Here are the users and groups in AD.
Admin Privilege Levels
I like to work backwards when configuring ClearPass. It’s handy to know that the configuration requirements are already in place and can be easily assigned to a policy later on in the configuration and there will be no surprises.
Click on Administration > Users and Privileges > Admin Privileges to view the ClearPass privilege levels available for assignment. In this example we are going to use the two inbuilt privilege levels:
- Super Administrator
- Read-only Administrator
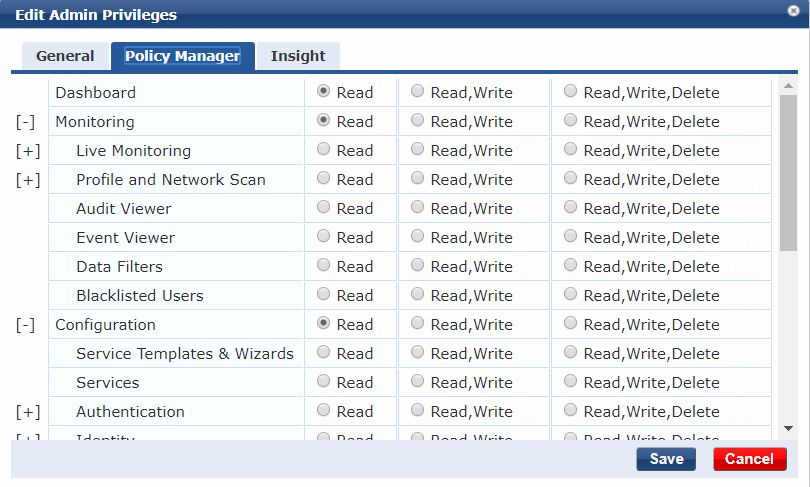
If we click on Read-Only Administrator and click on the Policy Manager tab, we can see what rights a user would have if assigned this privilege level. This is an inbuilt record and cannot be edited but you are free to create your own privilege levels if you
Enforcement Profiles
The privilege levels in the previous section are applied to administrative sessions using ‘attributes’ within enforcement profiles. An enforcement profile is the part of ClearPass that is responsible for applying one or more actions based on the conditions that are matched in the enforcement policy. There is a one-to-one mapping of enforcement profiles to admin privileges. To meet our requirements we will use two inbuilt enforcement profiles:
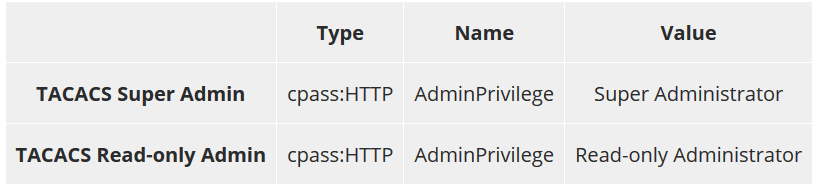
- [TACACS Super Admin]
- [TACACS Read-only Admin]
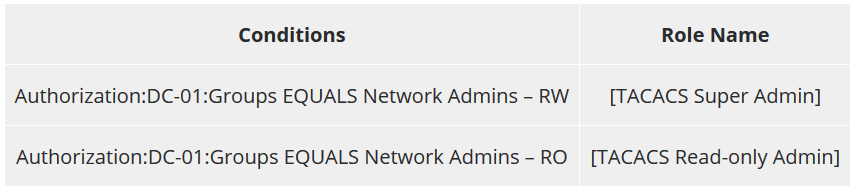
The table below shows the admin privilege levels assigned by each enforcement profile.
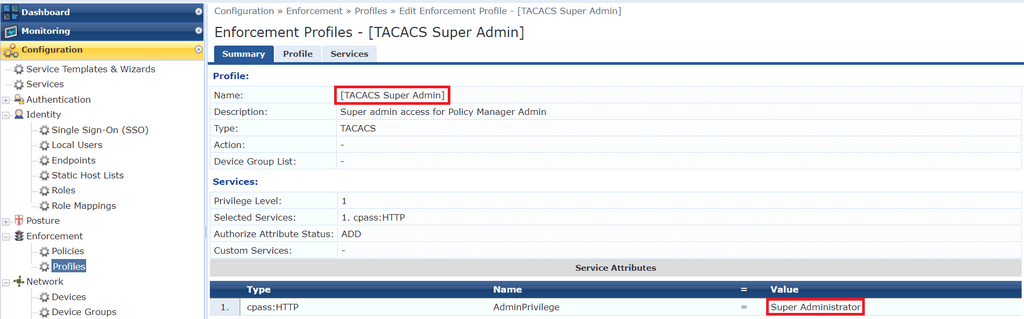
Click on Configuration > Enforcement > Profiles and select the profile [TACACS Super Admin] to see this in action.
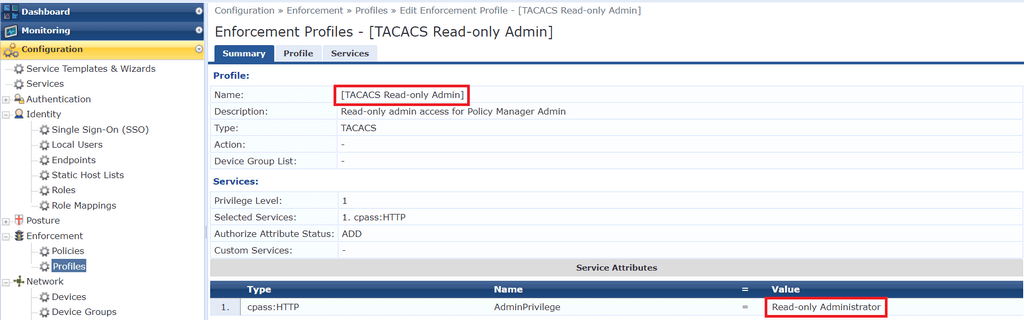
Go back and do the same with the [TACACS Read-only Admin] profile.
Role Mapping Policy
When authenticating a user against a set of policy conditions, ClearPass has the option to assign a ‘role’ to the administrator using a role mapping policy. This role can then be referenced in policy enforcement rules without having to repeatedly type complex configuration for each rule.
For TACACs services we can create a role mapping policy which assigns a ClearPass role based on a users AD group membership. I am mapping each of the AD groups we created earlier to an inbuilt role. If there is no match we will assign a role of [other], which has no AD group mapping, so the user will be denied access.
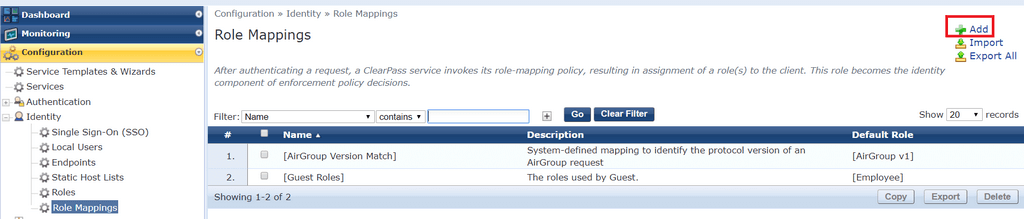
To create a role mapping policy click on Configuration > Identity > Role Mappings and click Add.
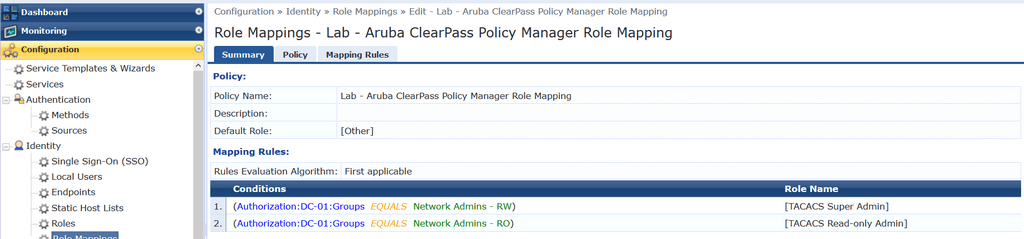
The Summary tab combines the configuration from both the Policy and Mapping Rules tabs.
Enforcement Policy
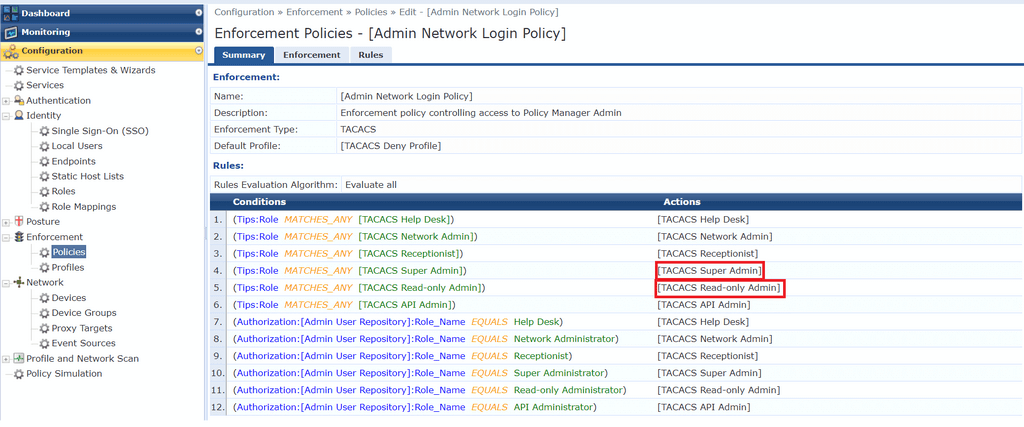
Next, we create an enforcement policy which simply assigns enforcement profiles based on the assigned role. You could create your own enforcement policy, however, the inbuilt policy named [Admin Network Login Policy] gives you exactly what you need. In fact, it will assign an enforcement profile to both TACACS users within AD or users created in the ClearPass local user database.
TIPS = Trust and Identity Policy System. So ‘Tips
Click on Configuration > Enforcement > Policies and click Add to create your own, or use the inbuilt [Admin Network Login Policy] shown below.
Service
It’s time to create a service, which is a means of grouping all of the policy components that serve a specific type of request into a single configuration set. While our service will reference other policies and profiles, it also has it’s own conditions that administrative sessions must match before the underlying policies and profiles are processed.
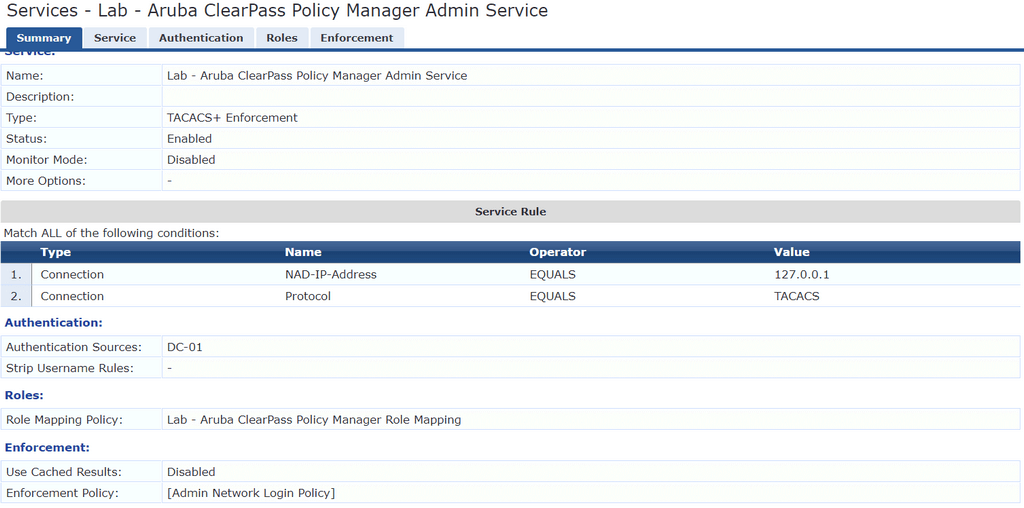
Click Configuration > Service and click Add to create a new service. As there are many options to configure, I am only showing the summary tab for the service.
Things to note –
- For ClearPass to authenticate TACACS requests against itself, the NAD IP address must be 127.0.0.1 (local host IP address)
- In Authentication Sources under the Authentication tab, ensure that AD is the only source in the list
- Depending on your AD setup, you may also need to tick the Strip Username Rules: checkbox in the Authentication tab
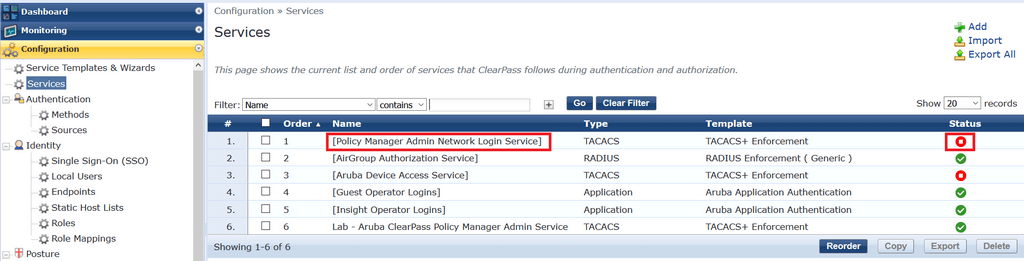
You also need to disable the inbuilt service named [Policy Manager Admin Network Login Service] or simply reorder the list of services by placing the one you just created above the inbuilt service. It’s best practice to disable or delete any service you do not require, although you cannot delete any item that is inbuilt to ClearPass.
Verification Testing
Time to test! When testing TACACS authentication it makes sense to use a different browser. This way one browser can be logged in to ClearPass using the local Admin account for troubleshooting purposes while the other browser is used to test user accounts themselves.
Here are the results in Access Tracker when I log in using the account
The user jdoe (Super Admin Access) is correctly applied the [TACACS Super Admin] enforcement profile.
And when I use bfrapples who is not part of any permitted AD group.
Congratulations, you have just allowed AD authentication for ClearPass Network Administrators!