In this post, I will show you how to cluster Aruba Mobility Controllers to get the benefits of the full range of HA and redundancy features provided by Aruba’s Campus Mobility Architecture. This post assumes you have already deployed a pair of Mobility Conductors. It also assumes that you have two Mobility Controllers connected to the Mobility Conductors.
If not, check out this post and this post for help with setting up your Mobility Conductors, or this post if you need help with setting up the Mobility Controllers.
- Confirm the Controller Status
- Configure the Controller Cluster
- Confirm the Controller Cluster
- Configure VRRP
- Verify VRRP
Confirm the Controller Status
Prior to doing any configuration, establish an SSH session with your Mobility Conductor and issue the command show switches. Confirm that there are two Mobility Controllers in the up state under the Status column and update successful under the configuration state column.

Configure the Controller Cluster
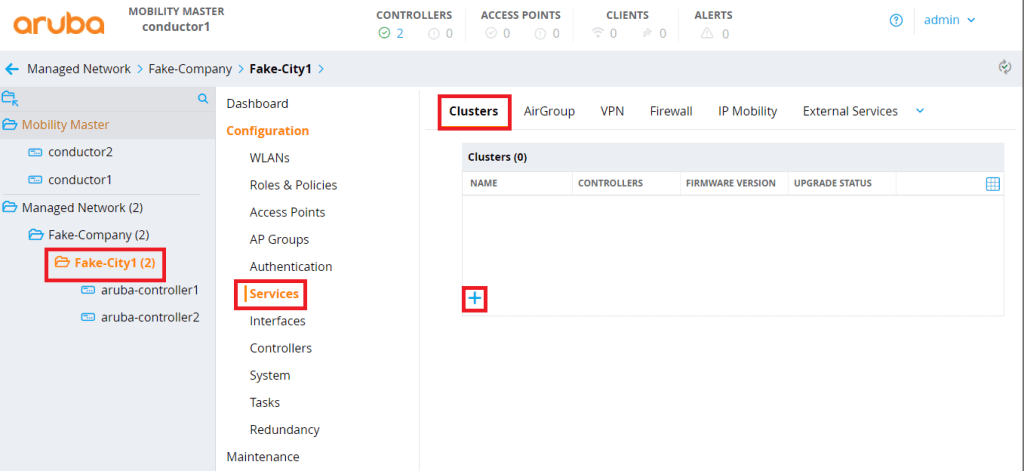
When you are happy that your Controllers are in their correct states, navigate to your Mobility Conductor dashboard. Then, select the group folder that your Mobility Controllers reside in. Select Configuration, Services, and Clusters, then click the + sign to create a new cluster profile.
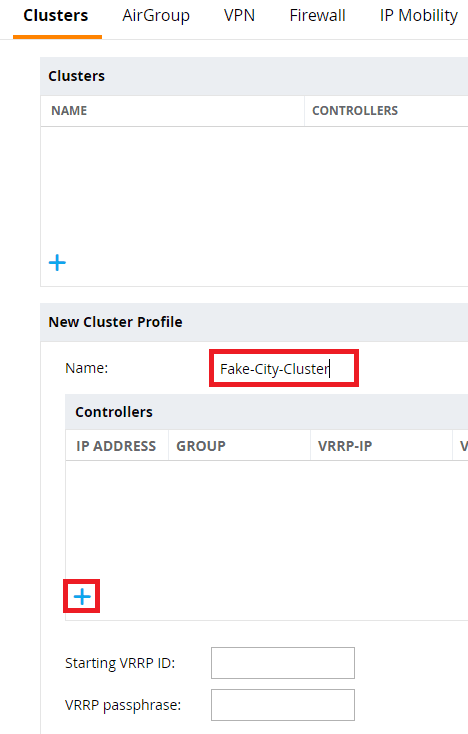
Enter a name for your cluster profile, then click the + sign to add your first Mobility Controller.
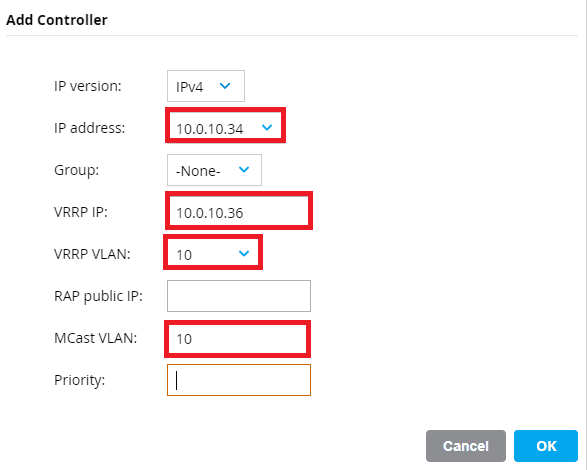
Select the management IP address of your first Mobility Controller from the IP address drop down box. Optionally give your cluster a VRRP IP address and specify the VRRP VLAN ID and Multicast VLAN. These options specify a VIP for RADIUS Change of Authorization (CoA) if you require this in your RADIUS communication flow.
It is best practice to specify a unique VRRP IP in this section for each of your Mobility Controllers. These IP will be the source and destination addresses for all RADIUS packets between the Controllers and RADIUS servers. The idea here is that if a Mobility Controller is not reachable and the RADIUS server needs to send a CoA request, the second Mobility Controller will take ownership of the VIP and accept the CoA packet.
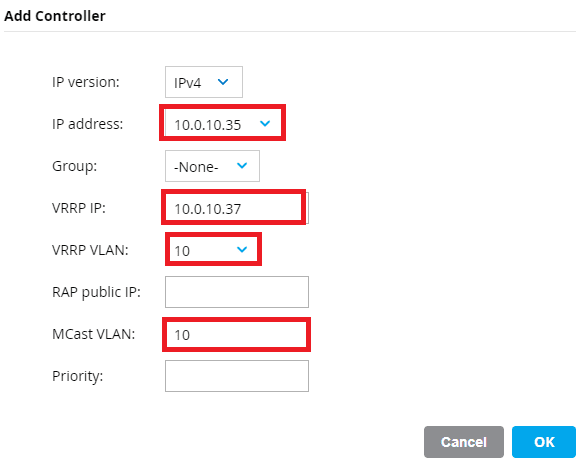
Repeat the steps for the second Controller.
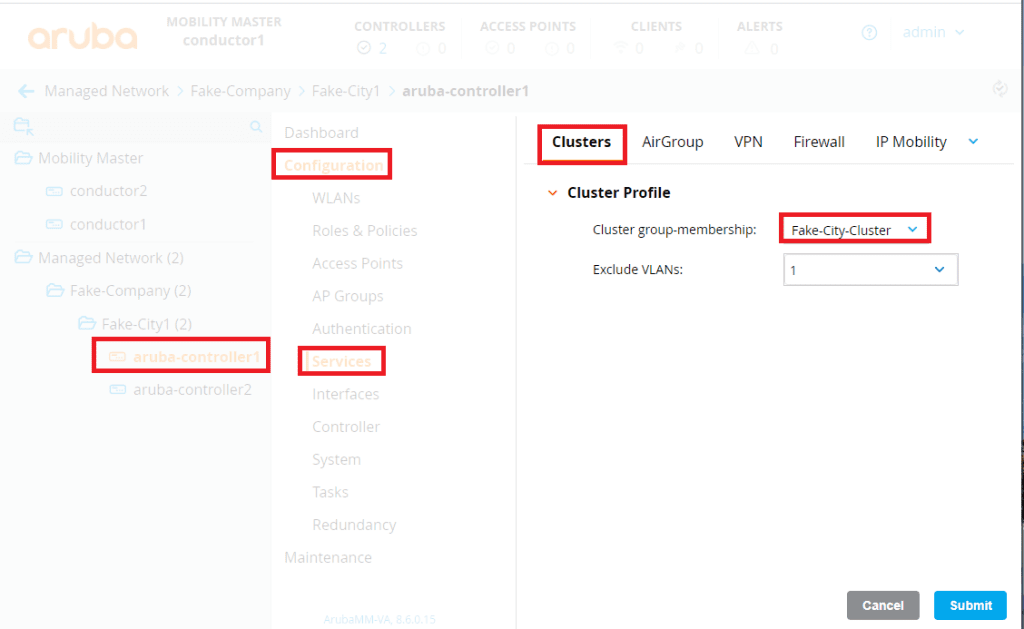
Click on the name of each of the Mobility Controllers and click on Configuration, Services, Clusters, then assign each Controller the cluster profile you just created by selecting it in the Cluster group-membership dropdown box. In the excluded VLANs list, specify any VLANs that exist on the Mobility Controllers but are not allowed on the network between the two Controllers. VLAN 1 is created on the Controllers by default but is not allowed on my lab network, so I will only specify VLAN 1. This is an important step to ensure that a Layer 2 cluster is created between the cluster.
Confirm the Controller Cluster
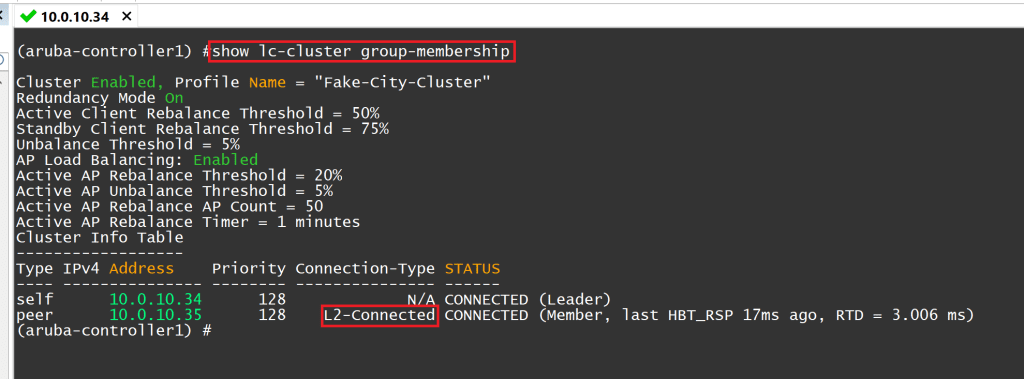
Establish an SSH session to each of the Mobility Controllers and issue the command show lc-cluster group-membership. Ensure that there are two Controllers with a status of connected and the Connection-Type is L2-connected.
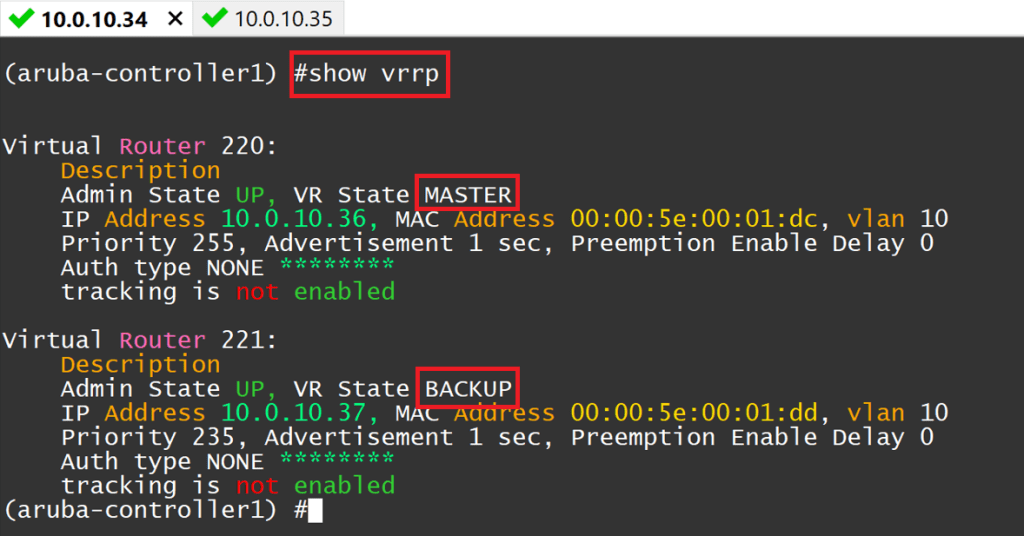
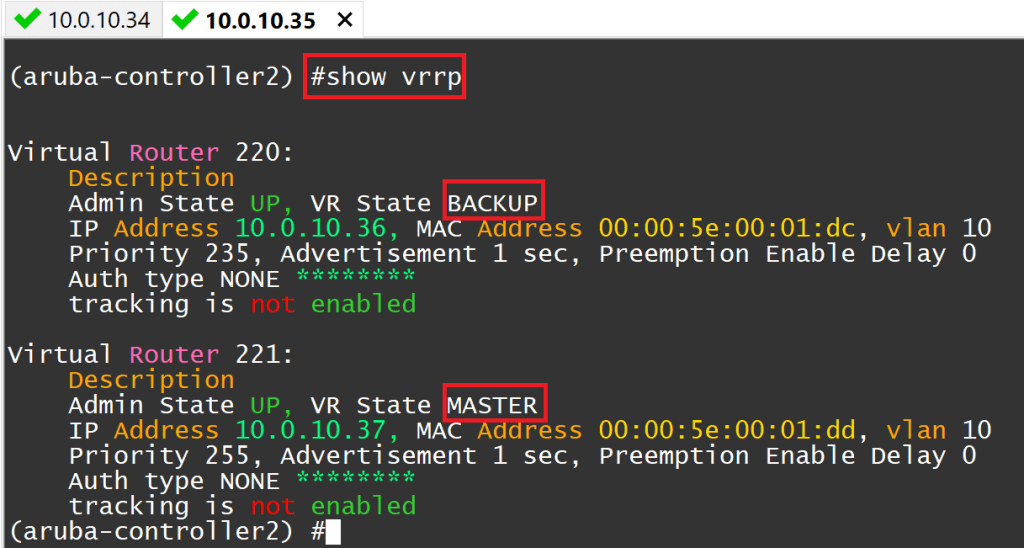
Issue the command show vrrp. You should see two Virtual Router IDs here, each with the IP addresses you assigned in the previous step. Each Controller will be in the master state for one VIP, and the backup state for the other. By default, the router IDs will use ID 220 onwards for each CoA VIP. If these IDs conflict with other VRRP instances on the subnet, you can specify the Starting VRRP ID when creating the cluster profile.
You can also use the command show lc-cluster vlan-probe status to assist in troubleshooting a cluster that won’t form correctly.

Configure VRRP
This step configures the VIP used for AP termination. When an AP boots, it attempts to join this IP before the cluster leader determines which Controllers the AP should build its Anchor and Standby Anchor to. This ensures that the AP and client load is distributed evenly across the Mobility Controllers and the APs have a redundant path if one of the Controllers was to fail.
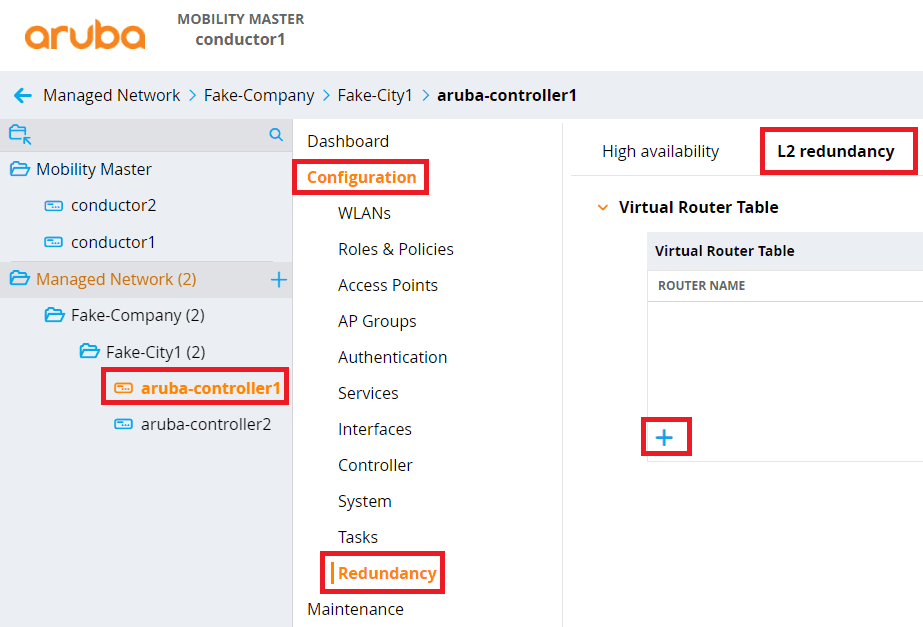
Click on the first Mobility Controller and click, Configuration, Redundancy, L2 Redundancy, and click the + sign to create a new VRRP VIP.
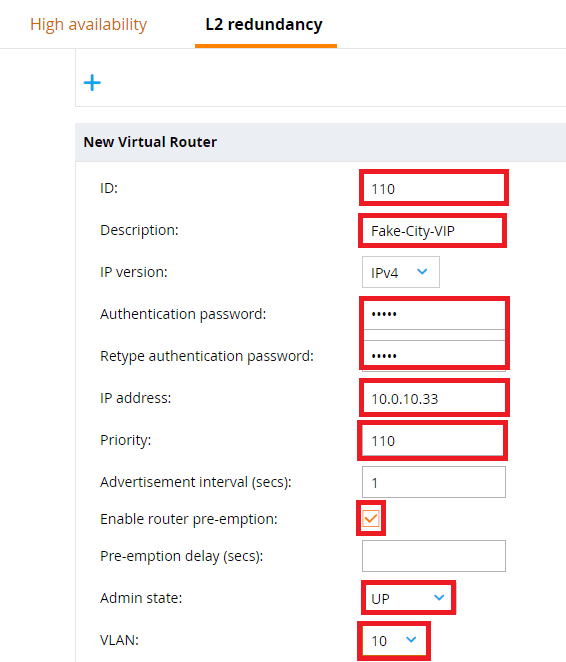
This section requires a lot of information, so I will break down each item:
- ID – VRRP Router ID. Must not be used by any other VRRP cluster within the same subnet
- Description – Friendly name of the VRRP instance. You could use something like ‘AP-Termination.’
- Authentication password – required to authenticate each of the two Mobility Controllers
- IP Address – The VRRP IP address that is shared between the two Mobility Controllers
- Priority – Allows a specific Controller to become the VRRP master if desired. The higher priority, the better chance it has to become the master.
- Enable router pre-emption – Allows a failed Controller to take over as the VRRP master when it comes back online. This is typically only enabled on the Controller with the higher priority, but there are scenarios where it can be enabled on all Controllers.
- Admin state: Enables the VIP.
- VLAN: The VLAN ID that the VIP resides in.
Click on the name of the second Controller and repeat the same steps. But this time, lower the Priority and don’t enable router pre-emption, unless required.

Verify VRRP
Lastly, head back to your SSH session on each Controller and issue the show vrrp again. You should see the VRRP Virtual Router ID that you just created, as well as the two that were created for your RADIUS CoA in the previous step. Running this command on both Controllers will show that one Controller has been designated a VRRP master and the other a VRRP backup.

That’s all, folks! Stay tuned for more Aruba AOS configurations.