In this post, I will show you how to configure Aruba AOS8 Mobility Conductor Redundancy. While you can operate your Aruba Wireless network using a single Mobility Conductor, the platform license covers you for two appliances. So unless you are low on resources in your lab, you should deploy a second Mobility Conductor for High Availability (HA).
I have written this post assuming you have deployed two Mobility Conductors with a basic setup. Check out my previous post if you need assistance deploying your Conductors or you want to confirm your setup.
Configuring VRRP
In the context of Aruba Mobility Conductors, Virtual Router Redundancy Protocol (VRRP) is used to provide a virtual IP address (VIP) for the following purposes:
- An always-accessible management interface for configuration deployment
- A fault-tolerant interface for data communication between the Mobility Conductors and Mobility Controllers
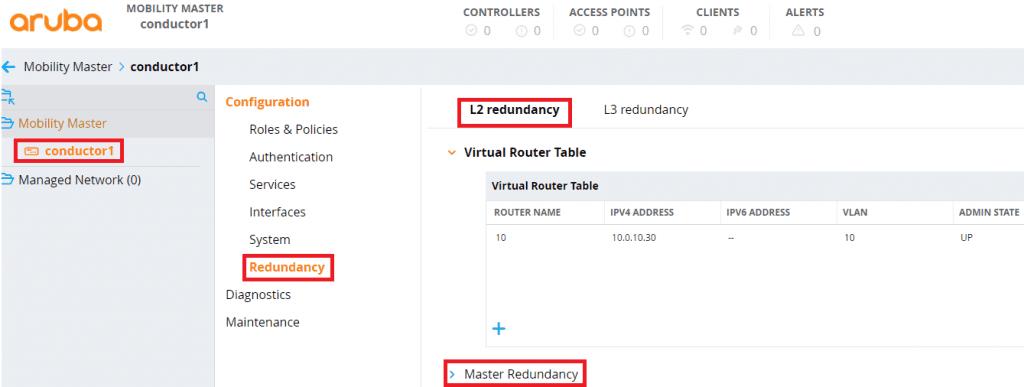
To configure VRRP, open a web browser and navigate to the IP address of the Mobility Conductor that you have designated as the primary appliance. Enter your credentials and click Log in. Expand the Mobility Master node on the upper left-hand side of the screen, then click on the hostname of your appliance. Click on Redundancy, Virtual Router Table, and then the + sign to create a new Virtual Router.
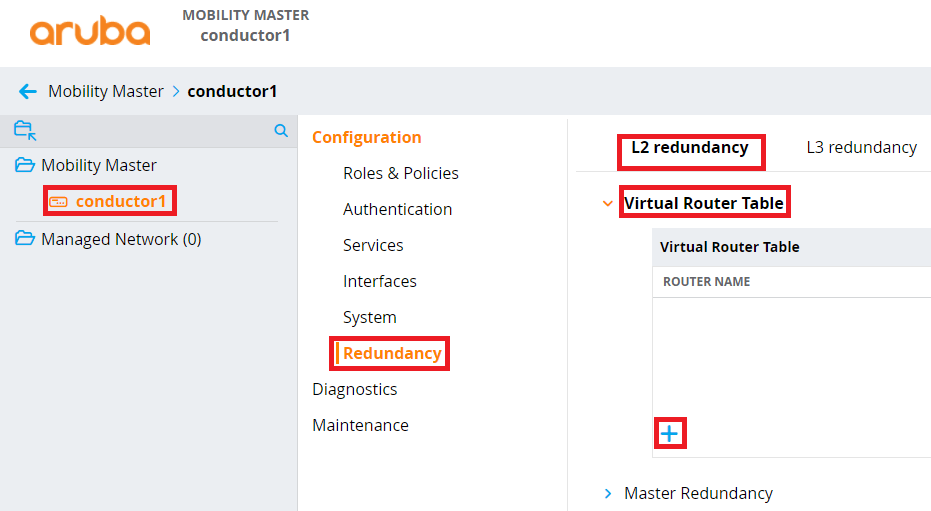
Configure the following details for the virtual router:
- ID – Best practice is to label this the same as your VLAN ID
- Description – Something that makes sense for your deployment
- IP Version – IPv4 or IPv6
- Authentication Password – Used to authenticate the two appliances
- IP Address – This is the VIP that the two appliances will share
- Priority – Determines which appliance becomes the primary; the higher, the better, so give this appliance a priority of 110.
- Enable router pre-emption delay – Enable if you want this appliance to become the primary when it comes back online after a failure.
- Pre-emption delay – How long this appliance must wait to become the primary when it comes back online – it prevents a flapping appliance from continuously becoming the primary.
- Admin State – Toggles the VRRP VIP on and off
- VLAN – Which VLAN the VRRP instance should be enabled for
Click on Submit when you have finished.
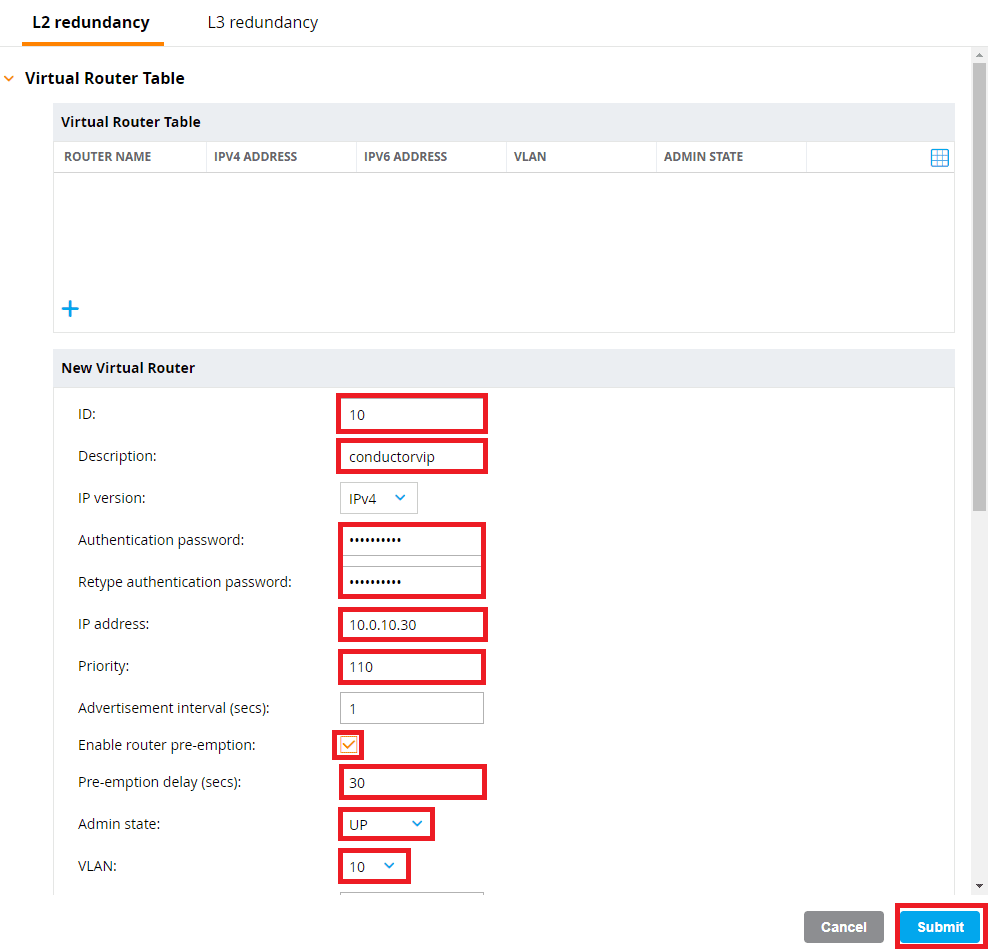
Navigate to the secondary Mobility Conductor and repeat the same steps, with the following exceptions:
- Give the secondary appliance a lower VRRP priority, such as 100.
- Don’t enable router pre-emption.
Verifying VRRP
It is good practice to verify that VRRP is operating correctly at this point. otherwise, troubleshooting connectivity issues can become more difficult if you skip this step.
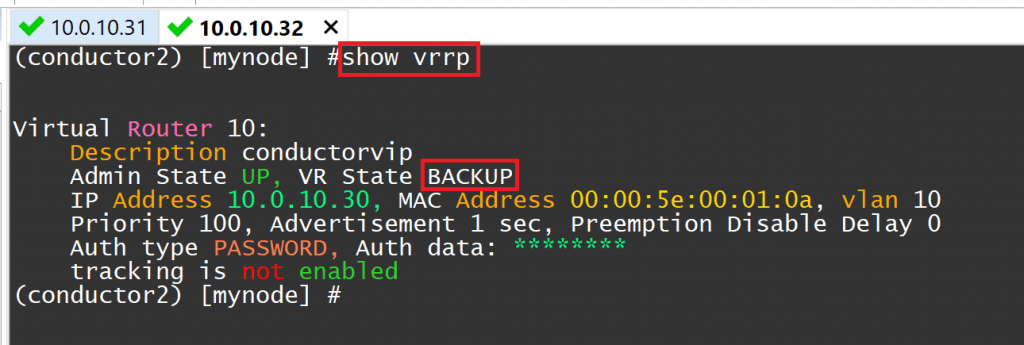
Using a terminal emulator such as SecureCRT or Putty, SSH into each appliance and issue the command show vrrp. The primary appliance should be in the MASTER state for the VRRP instance,
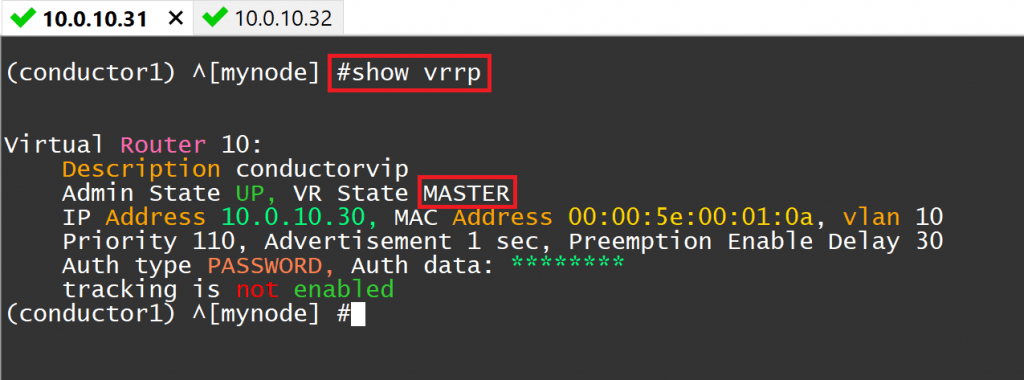
while the secondary appliance should be in the BACKUP state.
Also, confirm that you can ping the VIP assigned to the Mobility Conductors. This confirms that the primary appliance responds to IP packets sent to the VIP.

Configuring Master Redundancy
While VRRP provides IP failover for the Mobility Conductors, Master Redundancy provides database and config synchronisation between the two appliances.
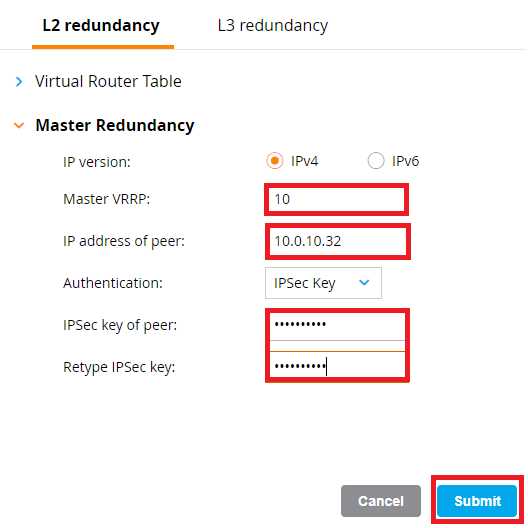
To configure Master Redundancy, navigate to the primary Mobility Conductor GUI and click on its hostname. Click on Redundancy, L2 Redundancy, Master Redundancy,
and configure the following options:
- IP version – IPv4 or IPv6
- Master VRRP – The VRRP ID that was configured in the previous step.
- IP address of peer – This is the real IP address of the other appliance.
- Authentication – Choose IPSec Key (Certificate authentication not in the scope of this post)
- IPSec Key of peer – Used to encrypt data transfers between the two appliances.
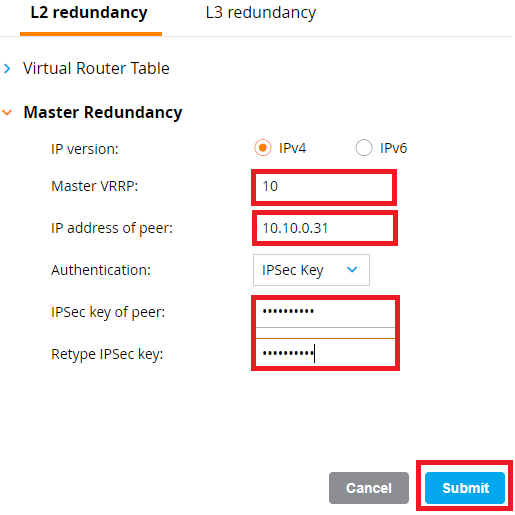
Navigate to the secondary Mobility Conductor and repeat the same steps, except for the peer IP address.
Once the two Mobility Conductors have performed their initial synchronisation and reached a stable state, any further changes made on the active Mobility Conductor are pushed to the standby Mobility Conductor. The exception to this is any change that is made directly to either of the appliances.
Head back to the primary Mobility Conductor and click on the Mobility Master node, then Redundancy.
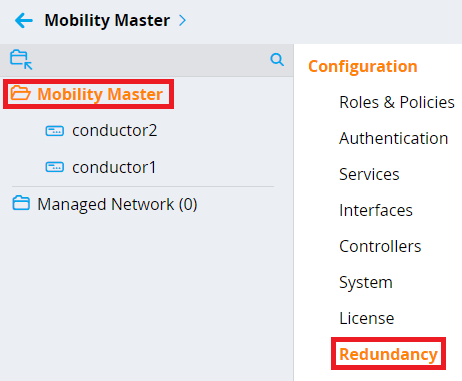
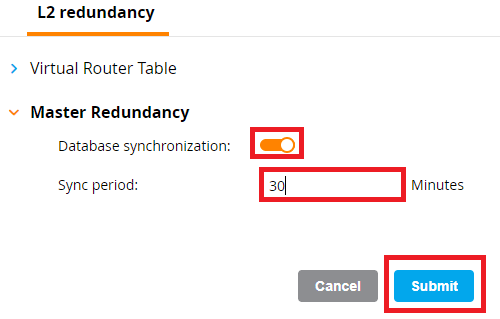
Click on L2 Redundancy, then Master Redundancy. Enable Database synchronization and set the Sync period to 30 minutes. Click Submit to continue. Did you notice that this option only appears if you currently have the Mobility Master parent node selected? There are a number of items that only appear when the Mobility Master parent node is selected. This is done to ensure that the configuration is pushed to both appliances.
Verifying Master Redundancy
Open the SSH session to your primary appliance, and issue the command database-synchronize to force a configuration sync. Wait some time and issue the command show database synchronize to confirm that the appliances are operating correctly. You should have your primary appliance operating as master and the secondary appliance operating as standby.
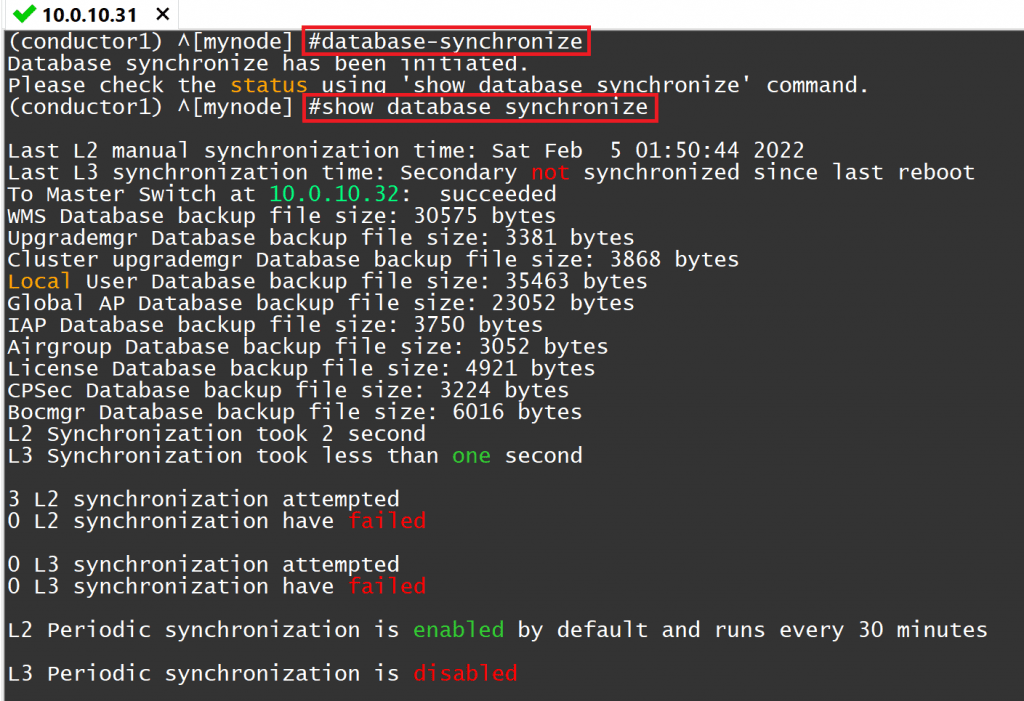
Once the database has finished synchronizing, the Configuration State should say UPDATE SUCCESSFUL and the Config ID should match on both devices.

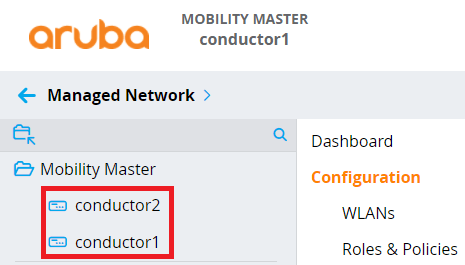
Head back to you primary appliance GUI and you should now see both Mobility Conductors listed by their hostname under the Mobility Master node.
That’s all, folks! Stay tuned for more Aruba AOS8 configs.